Overview:
Working with natural materials is an integral part of what makes the Luted Crucible process unique. To create a bronze object, first build a beeswax model, then form a clay mould around the model, shape a clay crucible, measure quantities of tin and copper for the bronze alloy and join the crucible to the mould, thereby creating a luted crucible. With a charcoal-fired, below-ground-level furnace, heat the Luted Crucible to over two thousand two hundred degrees Fahrenheit, magically transforming the ephemeral wax model into a timeless bronze object.
Step 1. Beeswax and Clay
When modeling objects, the beeswax can either be worked cold, in which case it is carved, or warm in which case it needs to be heated somewhat above room temperature. Here the wax objects have been created by carving and then the sprues (the cylindrical pieces) have been attached to the carved objects using drops of melted wax.

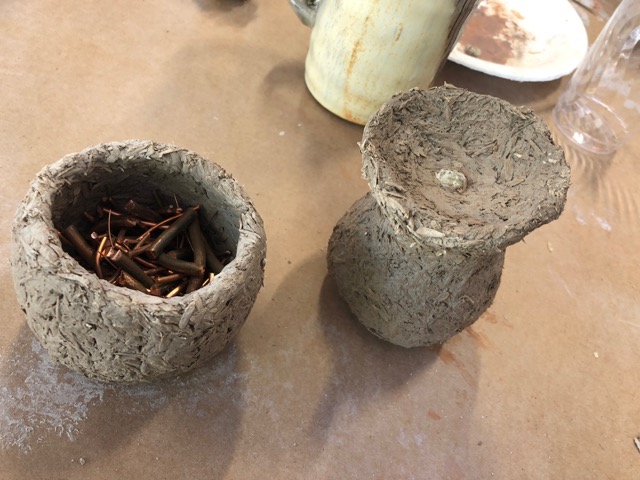
Moulds are made by pressing a sand:clay mixture around the wax objects, this is called investing the model and the clay mixture is the investment. At this time a clay crucible is made and set to dry.
When the investment has dried enough to be handled the moulds are encased in a protective layer of clay, the object on the right, and the crucible, the object on the left, is filled with metal.
As you can imagine these two steps are best done in a warm, dry, clay and wax friendly space such as this one…
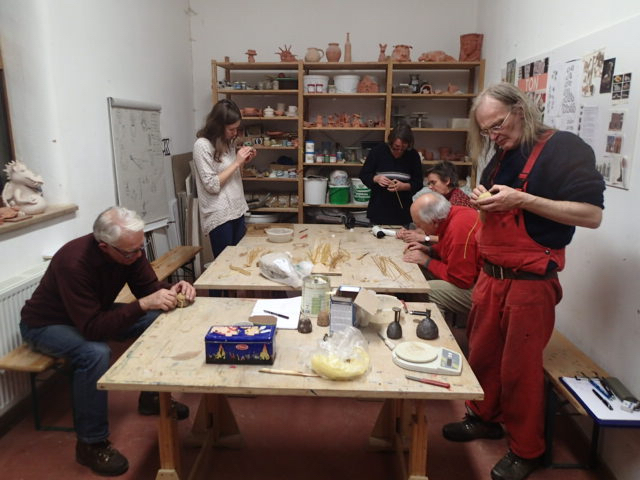
…and not, as we did here, in a cold, wet, leaky barn where some of our water bowls had to be used to catch the rain that was dripping in!

Step 2. Casting
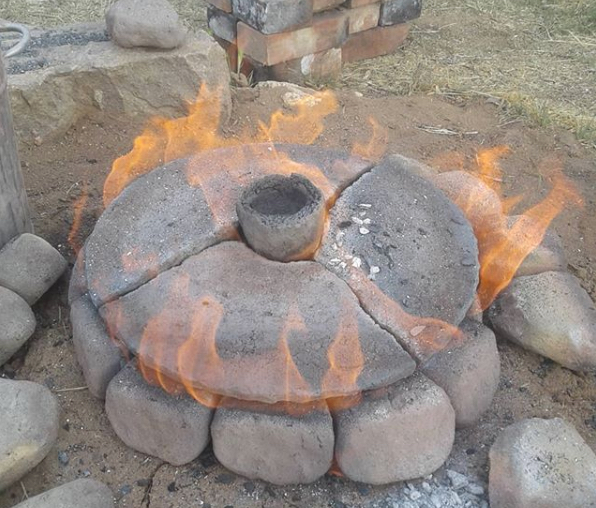
The furnaces can be above ground, below ground, small, large, wood fired, charcoal fired or gas fired. Pretty much any situation can be adapted in order to accommodate a furnace.
Typically, casting Luted Crucibles is done outside with a below ground level charcoal fired furnace whose dimensions are about 9″ in diameter and 14″ deep. This one has a lid to help hold the heat in and the central hole is plugged with a clay cup (the Luted Crucible is inside the furnace under the lid).
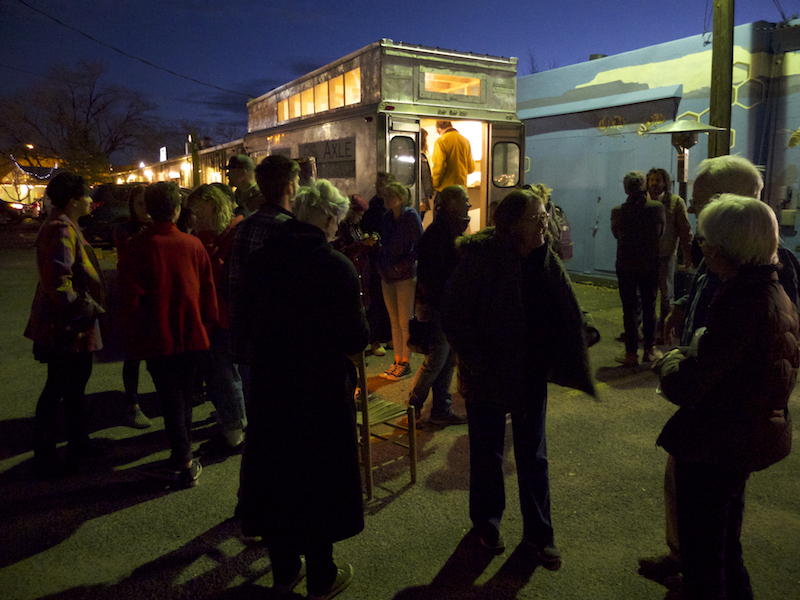
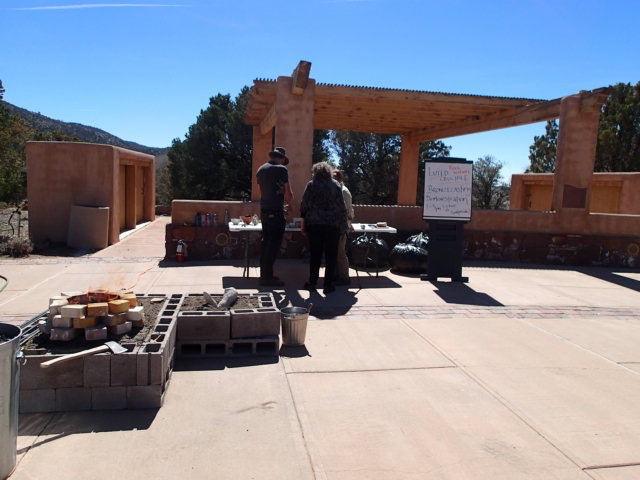
Casting can also be done in an above ground furnace when it is not possible to dig into the surface. This wood-fired casting workshop took place in the parking lot of New Mexico School for the Arts…..

….and this charcoal-fired casting demonstration happened in front of the Museum of International Folk Art, also in Santa Fe, New Mexico.
Gas-fired casting workshops have been done in a pedestrian area in central London. Here five gas fired furnaces are going (and about the same number of very nervous health and safety guys have somehow managed to escape being in the photo) in front of University College London’s Institute of Making.

Casting can be done in the deep snow as it was here in upstate New York in February (the child in the picture is fine, although he appears frozen, he’s not)….

…and in pouring rain in the Westfalia region of Germany in November.

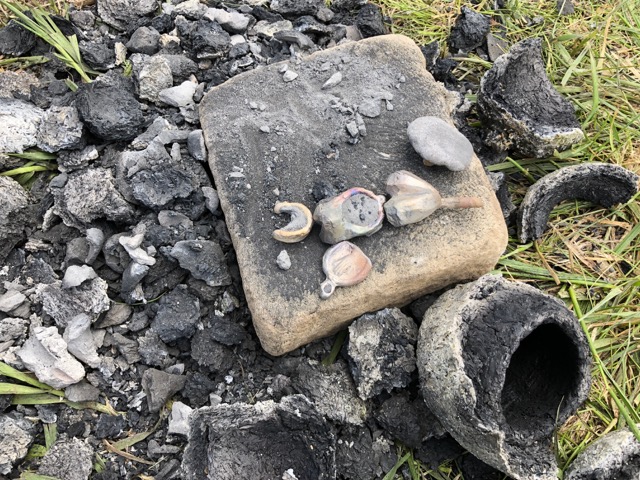
Step 3. Finishing
Finishing can be as simple as removing the clay and giving the metal a scrub with a hand held wire brush, to as complicated as cutting, grinding, sanding, polishing, patina-ing, and more.
Here the pieces have been cast and the layers of clay removed.
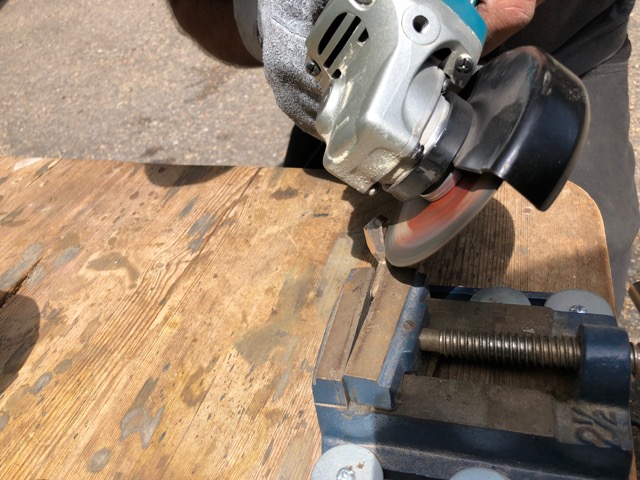
For some objects a table with a vise and an angle grinder can be helpful…
…others need smaller tools such as a flexible shaft rotary tool and most need a few minutes on polishing wheels (the yellow wheel in the background).

Finally, it’s nice for everyone to get together for a group photo.

Sometimes a very last step is added in which an exhibition of all the work that was made takes place. Click here to see the work done by New Mexico School for the Arts students, six local artists, and Axle Contemporary in 2015.